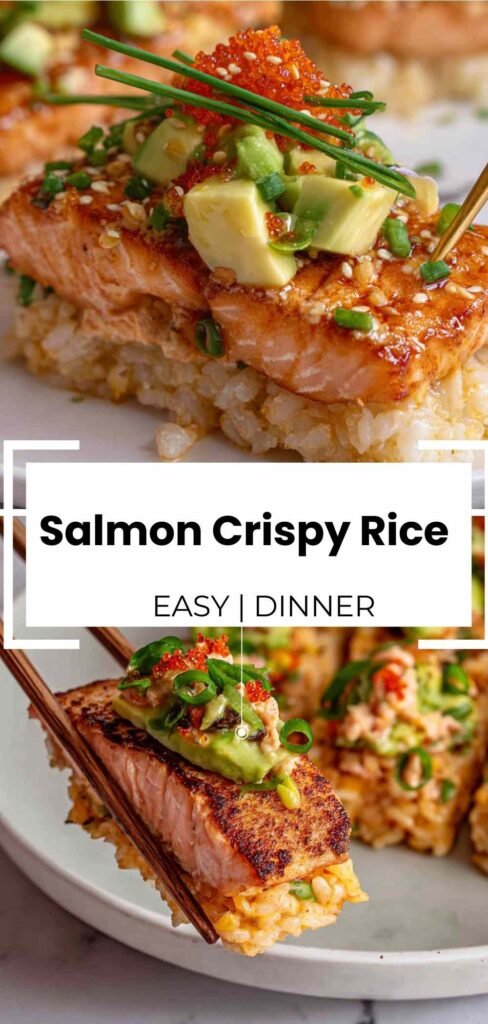
I tried salmon crispy rice for the first time at a friend’s dinner party back in 2019, and I practically begged for the recipe before leaving.
The contrast between that crunchy, golden rice base and the creamy, spicy salmon topping had everyone reaching for seconds. What surprised me most was learning how simple the technique actually is once you understand the key steps. The secret is proper chilling time for the rice and maintaining the right oil temperature. Yes, you need to plan ahead for the chilling, but the hands-on work is minimal. Time to cook!
Table of Contents
Ingredients for Salmon Crispy Rice
I always source my sushi-grade salmon from a trusted fishmonger or a specialty seafood counter. The quality and safety of your salmon truly makes the difference here, so don’t skip asking if it’s labeled sushi-grade or previously frozen. In my experience, building a relationship with your seafood supplier helps you get the freshest options available.
For the Crispy Rice:
- 3 cups cooked sushi rice (short grain rice)
- 2 tablespoons rice vinegar
- 1 tablespoon sugar
- 1 teaspoon salt
- Vegetable oil for frying (about 2 to 3 tablespoons per batch) – I recommend using an oil with a high smoke point
For the Spicy Salmon:
- 1 lb sushi-grade salmon (finely diced into small, uniform pieces)
- 4 tablespoons Kewpie mayo – My preference is always Kewpie brand because it has a richer, slightly sweeter flavor than regular mayo
- 2 tablespoons sriracha (adjust based on your heat preference)
- 2 tablespoons scallions (finely chopped)
- 2 teaspoons soy sauce
- 2 teaspoons sesame oil – In my experience, toasted sesame oil adds the best nutty depth
For Topping:
- 1 ripe avocado (sliced thin) – I usually choose avocados that yield slightly to gentle pressure
- 1 jalapeño (thinly sliced into rounds)
- Black and white sesame seeds (toasted) – I toast mine in a dry skillet for 2 to 3 minutes until fragrant
Step-by-Step Instructions
I recommend starting this recipe the night before you plan to serve it. The extended chilling time makes all the difference in getting rice that holds together perfectly when fried.
Step 1: Combine the rice vinegar, sugar, and salt in a small bowl, stirring until the sugar completely dissolves. Pour this mixture over your freshly cooked, still-warm sushi rice and fold gently using a cutting motion with a rice paddle or wooden spoon. Avoid mashing the grains. The rice should be slightly warm when you season it for best absorption.
Step 2: Press the seasoned rice firmly into a plastic wrap-lined baking pan (approximately 8×8 inches works well), creating an even, compact layer about 1 inch thick. The firmer you press, the better the rice will hold together when frying. Cover tightly with plastic wrap and refrigerate for at least 4 hours, though overnight is ideal for easiest slicing.
Step 3: Dice your sushi-grade salmon into small, uniform pieces about ¼ inch in size. Mix it thoroughly with the Kewpie mayo, sriracha, soy sauce, scallions, and sesame oil until well combined. Keep this mixture refrigerated in a covered bowl until you’re ready to assemble. I usually prepare this while the rice is chilling.
Step 4: Remove the chilled rice from the refrigerator and cut it into 16 equal rectangles (4 rows by 4 rows). Use a sharp knife dipped in water between cuts to prevent sticking. Heat about 2 to 3 tablespoons of vegetable oil in a large skillet over medium heat. Test the oil by dropping in one grain of rice; if it sizzles immediately and vigorously, you’re ready to fry.
Step 5: Carefully place 4 to 6 rice rectangles in the hot oil without overcrowding your pan. Fry for 3 to 4 minutes per side until golden brown and crispy with a nice crust. You’ll hear a steady sizzle. Transfer to a paper towel-lined plate to drain excess oil. Repeat with remaining rice rectangles, adding fresh oil between batches as needed.
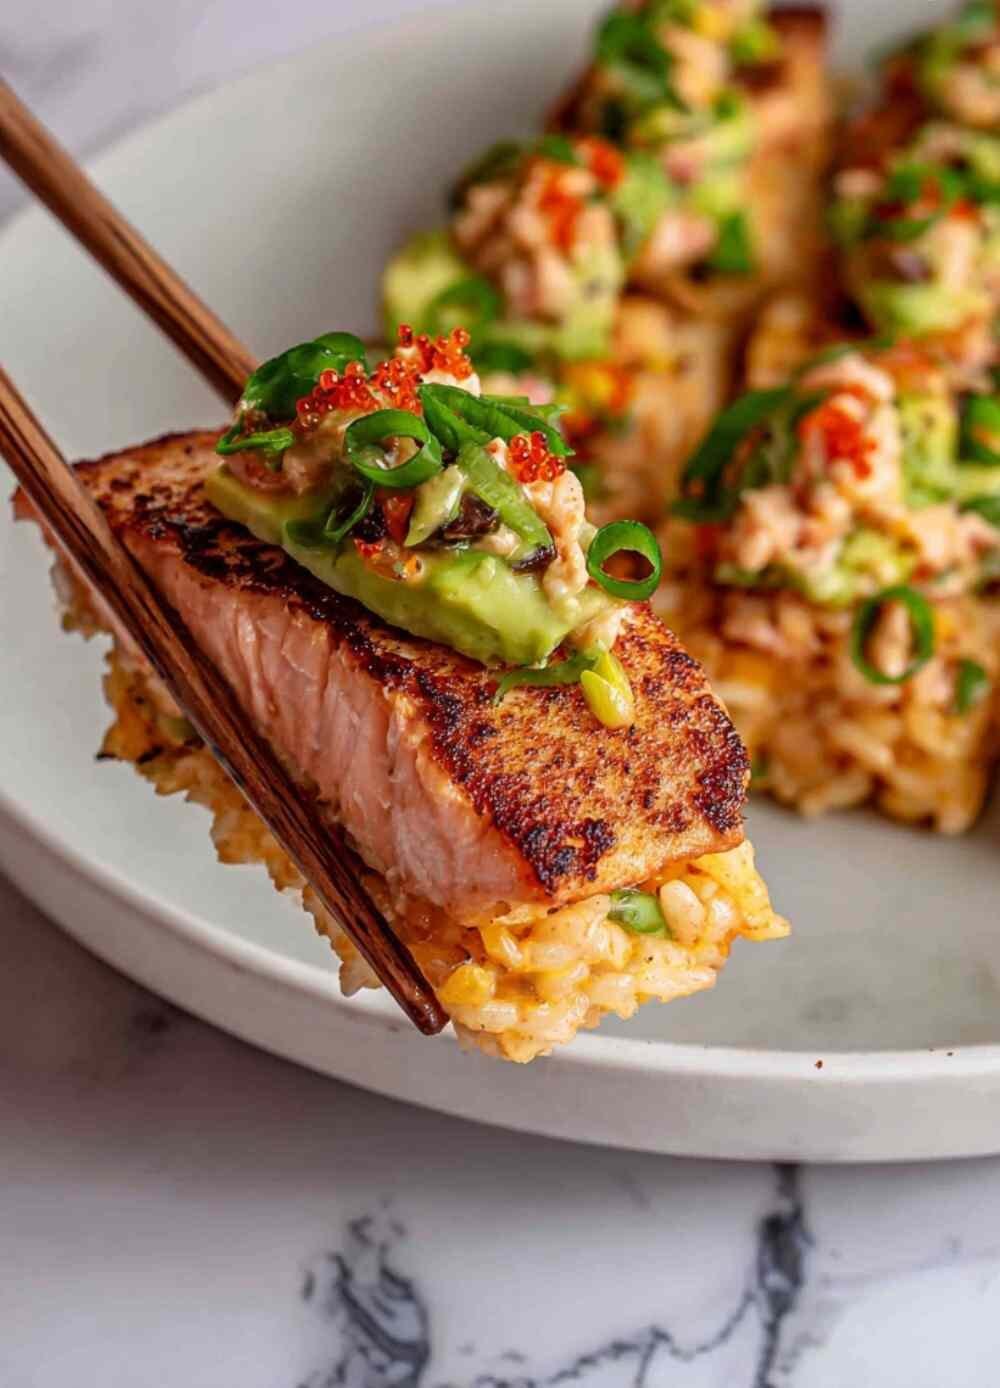
Step 6: Top each crispy rice cake with a thin slice of avocado, about 1 tablespoon of the spicy salmon mixture, and a jalapeño slice. Sprinkle with toasted sesame seeds and serve immediately while the rice is still warm and crispy. Assemble no more than 5 minutes before serving to maintain the best texture contrast.

Perfect Pairings for Salmon Crispy Rice
Since salmon crispy rice is rich and filling, I like pairing it with lighter sides that provide refreshing contrast without competing for attention.
Seaweed Salad: The bright, briny flavor and crisp texture of seaweed salad provides a refreshing contrast to the creamy salmon topping. It’s a classic Japanese pairing that adds minerals and umami while cleansing your palate between bites.
Edamame with Sea Salt: Simple steamed edamame makes an excellent protein-rich side that keeps things light. The mild, slightly sweet flavor complements the spicy salmon without overwhelming your palate, and it’s ready in just minutes.
Miso Soup: A warm bowl of miso soup with tofu and scallions rounds out the meal beautifully. The savory broth cleanses your palate between pieces and adds comforting warmth to balance the cold toppings on your crispy rice.
Asian Cucumber Salad: Thinly sliced cucumbers tossed with rice vinegar, sesame oil, and a touch of sugar offer cooling crunch. This side balances the richness of the fried rice and helps cut through the mayo-based topping with its bright acidity.
Sticky Garlic Chicken Noodles: For a heartier spread at your dinner party, these savory noodles complement the fusion flavors of the crispy rice while providing a satisfying carb option for guests who want something more substantial.
Pickled Ginger: Traditional pickled ginger serves as a palate cleanser between pieces. Its sharp, tangy flavor refreshes your taste buds and prepares you for the next delicious bite, just like at a sushi restaurant.
Keep It Fresh: Storage Guidelines
Store any leftover crispy rice and spicy salmon separately in airtight containers in the refrigerator. Once fried, the rice loses crispiness within 2 to 3 hours due to moisture, so it’s really best enjoyed fresh. Do not refrigerate fried rice if you want to maintain any crispness. The spicy salmon mixture will stay fresh for up to 24 hours when properly refrigerated at 40°F or below.
If you need to prepare components ahead, I recommend shaping and chilling the unfried rice blocks up to 2 days in advance. Keep them tightly covered in the refrigerator until you’re ready to fry. The salmon mixture can also be prepared up to 6 hours ahead, but make sure it stays consistently cold until assembly time for food safety.
For best results, fry the rice just before serving and assemble immediately. If the fried rice has cooled slightly, you can re-crisp it briefly in a hot skillet for 1 to 2 minutes per side. However, once assembled with toppings, these are meant to be enjoyed right away for that perfect crispy-creamy texture contrast that makes this dish so special.
Frequently Asked Questions
Can I use regular rice instead of sushi rice?
While sushi rice works best due to its sticky, high-starch texture, you can use short-grain white rice in a pinch. The key is ensuring your rice has enough natural starch to hold together when pressed and fried. Avoid long-grain varieties like jasmine or basmati as they won’t bind properly and will fall apart during frying.
What if I can’t find sushi-grade salmon?
Smoked salmon is an excellent alternative that’s already safe to eat and adds a nice smoky flavor dimension. You can also fully cook regular salmon (bake at 400°F for 12 minutes) and flake it into the mayo mixture for a cooked version that eliminates any raw fish concerns while still tasting delicious.
Why is my rice falling apart when I fry it?
This usually means the rice wasn’t chilled long enough or wasn’t pressed firmly enough when shaping. Make sure you refrigerate for at least 4 hours (overnight is better) and press the rice down very firmly in the pan to create compact blocks. The oil temperature also matters; if it’s too low, the rice will absorb oil and break apart instead of forming a crispy crust.
Salmon Crispy Rice
Ingredients
Equipment
Method
- Combine rice vinegar, sugar, and salt in a small bowl, stirring until completely dissolved. Pour over freshly cooked, still-warm sushi rice and fold gently using a cutting motion to avoid mashing the grains.
- Transfer rice to a plastic wrap-lined baking pan (approximately 8×8 inches). Press firmly into an even, compact layer about 1 inch thick. Cover tightly with plastic wrap and refrigerate for at least 4 hours or overnight for best results.
- Dice sushi-grade salmon into small, uniform pieces about 1/4 inch in size. Combine with Kewpie mayo, sriracha, soy sauce, scallions, and sesame oil. Mix thoroughly and refrigerate in a covered bowl until ready to use.
- Remove chilled rice from refrigerator and cut into 16 equal rectangles (4 rows by 4 rows). Use a sharp knife dipped in water between cuts to prevent sticking.
- Heat about 2 to 3 tablespoons vegetable oil in a large skillet over medium heat. Test oil temperature by dropping in one grain of rice; if it sizzles immediately and vigorously, oil is ready.
- Fry 4 to 6 rice rectangles at a time for 3 to 4 minutes per side until golden brown and crispy. Avoid overcrowding the pan. Transfer to paper towel-lined plate. Repeat with remaining rice, adding fresh oil between batches.
- Top each crispy rice cake with a slice of avocado, 1 tablespoon spicy salmon mixture, and a jalapeño slice. Sprinkle with toasted sesame seeds. Serve immediately while rice is warm and crispy. Assemble no more than 5 minutes before serving.
Notes